Introduction
Modern digital forensics and incident response cases may involve quite different types of devices. The variety of electronic gadgets increases every day, from traditional smartphones to yet uncommon things such as smart contact lenses or toasters with Internet connection, allowing to burn today's weather forecast on your morning piece of bread.
No surprise that you use different tools to acquire data from different types of devices, to get most out of them. Now, an issue may arise: how to find a connection between data extracted from a smartphone and a computer drive? Your regular digital forensic tool most possibly works with its proprietary format and a couple of industry standards, however if it is mostly phone forensics-oriented, it will not mount a computer image, and vice versa.
Here is where Belkasoft's flagship DFIR product will help.
About Belkasoft X
In this article, we will describe analysis of different data sources by Belkasoft X (a short for Belkasoft Evidence Center X), a new digital forensics and incident response product by the company, which currently holds one of leader places in the industry, with its Evidence Center product voted as Top-3 DFIR Commercial Tools at Forensic 4:Cast Awards 2018, 2020, 2021, 2022 and 2023.
Belkasoft X is the only DFIR product in the world, which supports computer and mobile forensics, including agent-based and checkm8-based iOS acquisition, memory examination and incident investigations in a single tool. You can read more on the product at https://belkasoft.com/x.
In particular, the product allows you to mount about 50 different formats of images and dumps, that enables you to do cross-device analysis and see top-level diagrams like communication graph, visualizing links between entities in your case.
Adding data sources in Belkasoft X
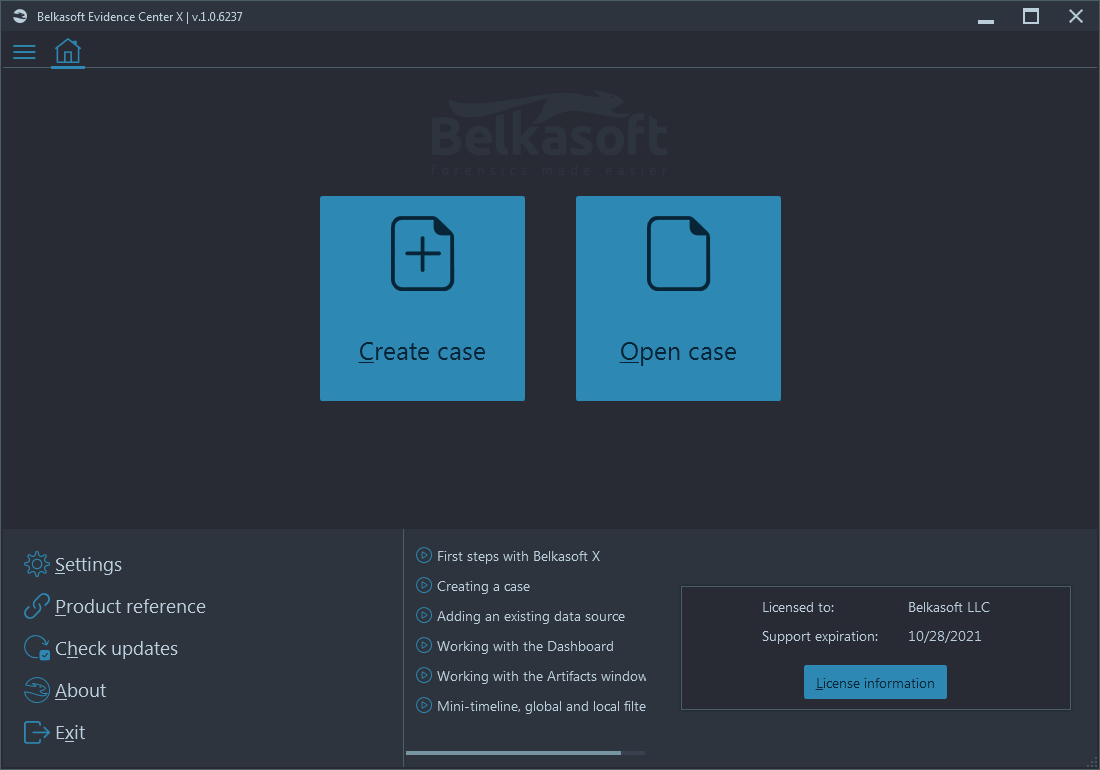
When you open Belkasoft X, the Home window is shown where you can create a new case or open an existing one:
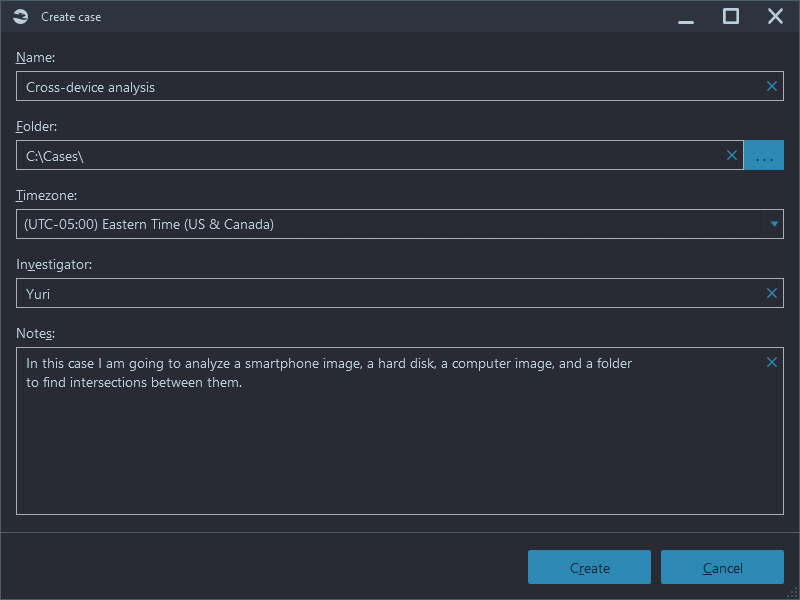
During the case creation, you can specify its name, time zone, provide your name and case description:
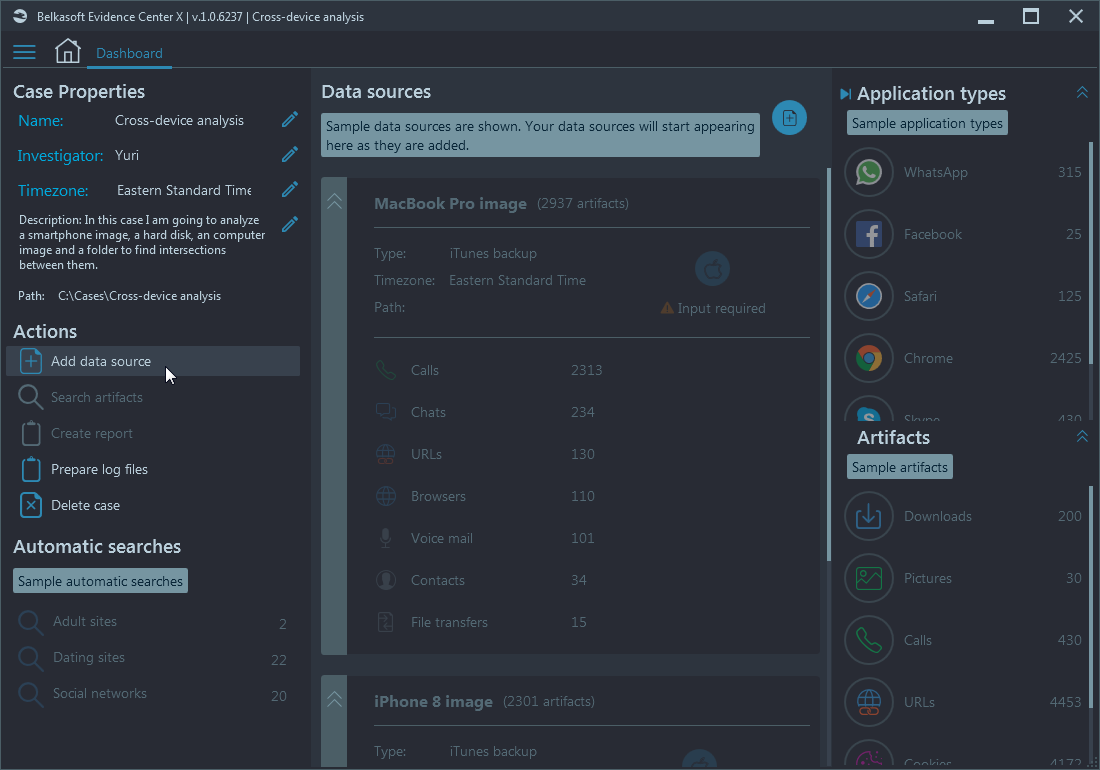
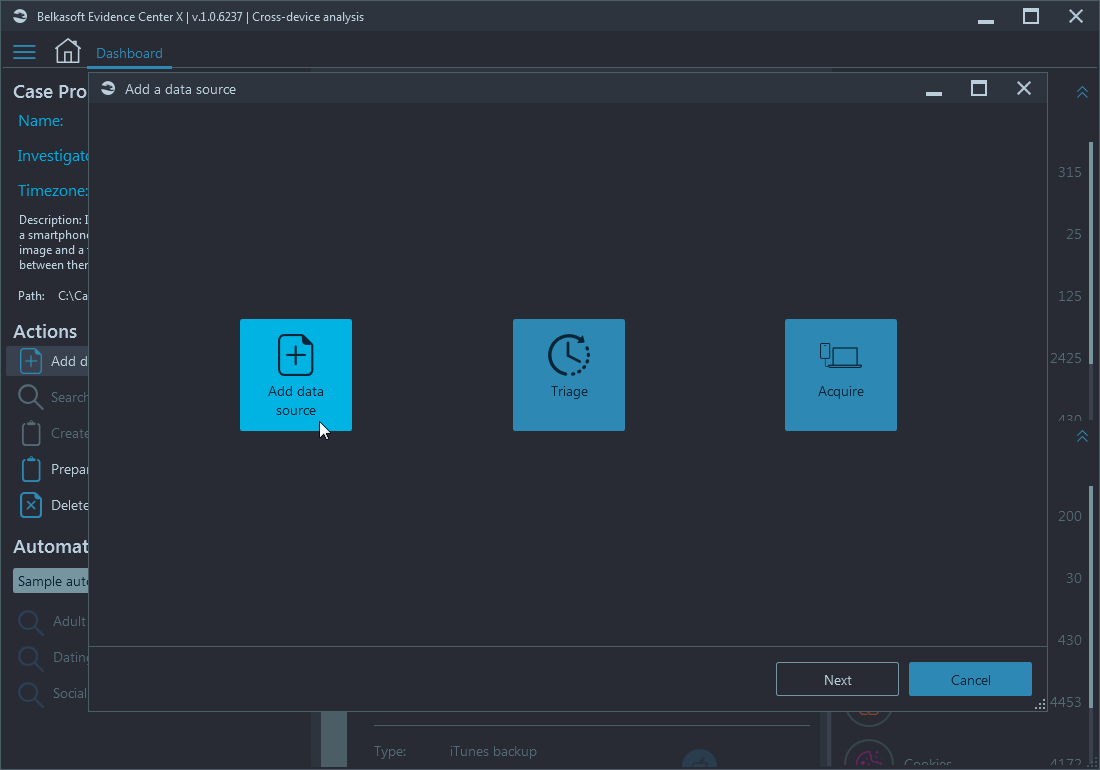
Upon creating a new case, the Dashboard window will be shown with the Add data source action:
At your disposal there are adding an image or a dump, quick triage analysis and acquisition of a device or a cloud:
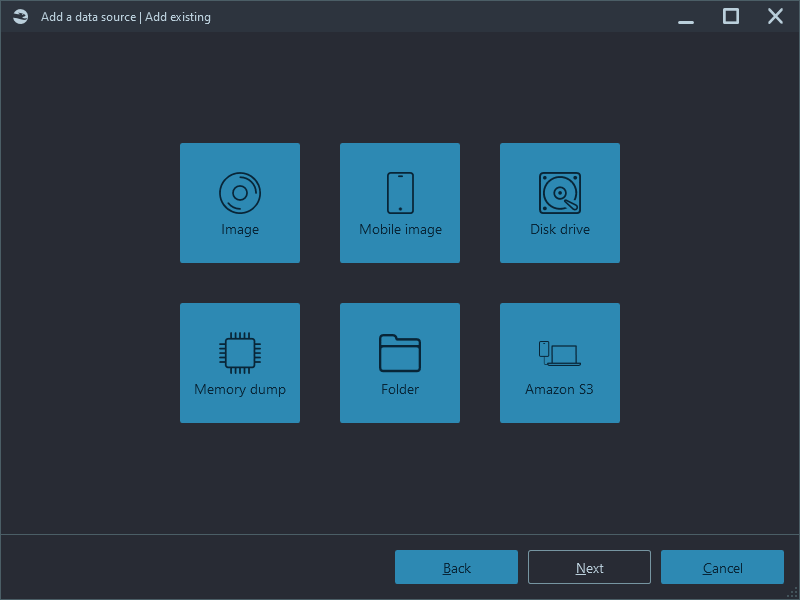
Let us opt for Add data source, which adds an existing image to the case. Here, you can choose a computer image, a smart device image, a disk drive (any hard or SSD or removable drive connected to your machine), a volatile memory (RAM) dump, that includes page and hibernation files, and a folder:
Supported image and dump formats
Among computer images, there are various industry standards, such as E01, Ex01, AFF, AFF4, S01 and DD. You will find various vendor-specific formats, including Access Data, X-Ways. Finally, various virtual machine file formats and archives (multi-part archives included) are supported.
For mobile devices, Belkasoft X supports standard backups for Android, iOS and Blackberry smartphones and tablets, third-party vendor images, such as GrayKey and UFED, Xiaomi and Huawei-specific backups, and even hardware-specific images such as JTAG and chip-off dumps.
For both computer and mobile devices, Belkasoft X has its own format, should you decide to acquire them using the Belkasoft suite. The acquisition with Belkasoft will be covered in another article.
There are more options: add a hard or removable drive, connected to your forensic machine, analyze a memory dump (any dumps created with Belkasoft or another product output; hibernation and page files included), and a single folder.
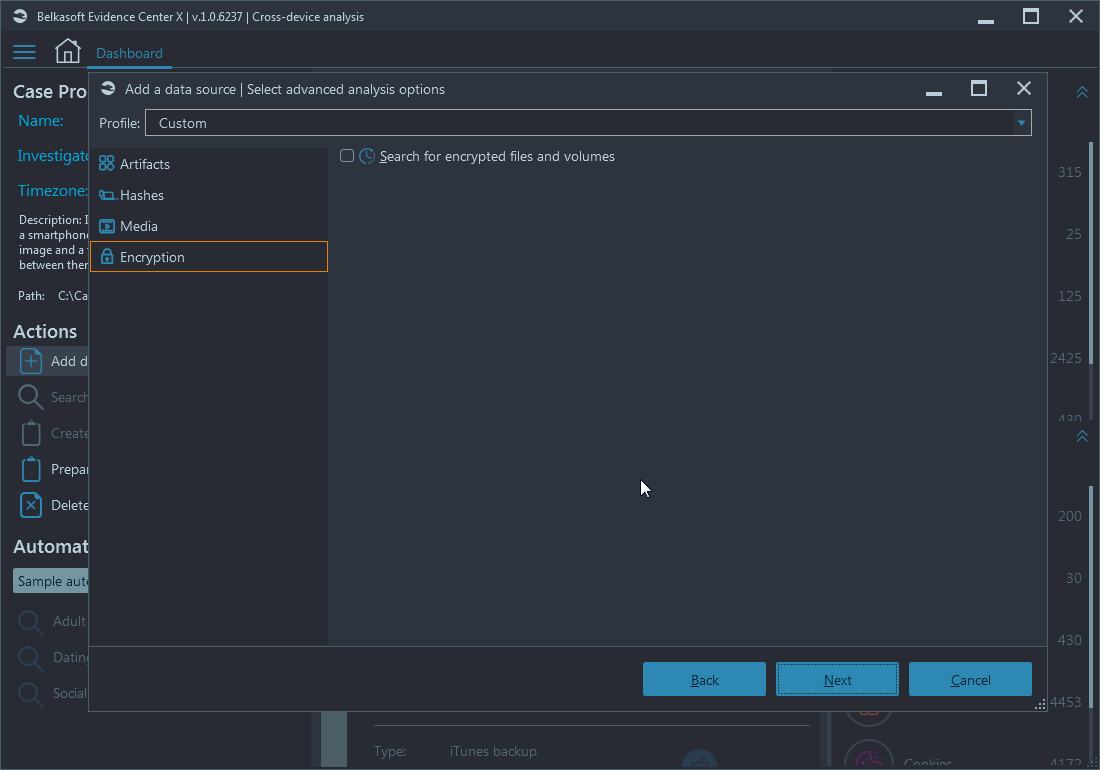
Encryption
Belkasoft X supports various types of encryption such as WDE (whole disk encryption) and FVE (full volume encryption). If you are adding a data source, which has encrypted parts (volumes) or is completely encrypted, the product automatically detects that and allows you to enter a decryption password or a recovery key:


If the password is correct, the decrypted data source structure will be shown. The same will happen if you add an encrypted iTunes backup (BTW, do you know, why you would prefer encrypted one over unencrypted?).
Flexibility: selecting parts of images and types of analysis
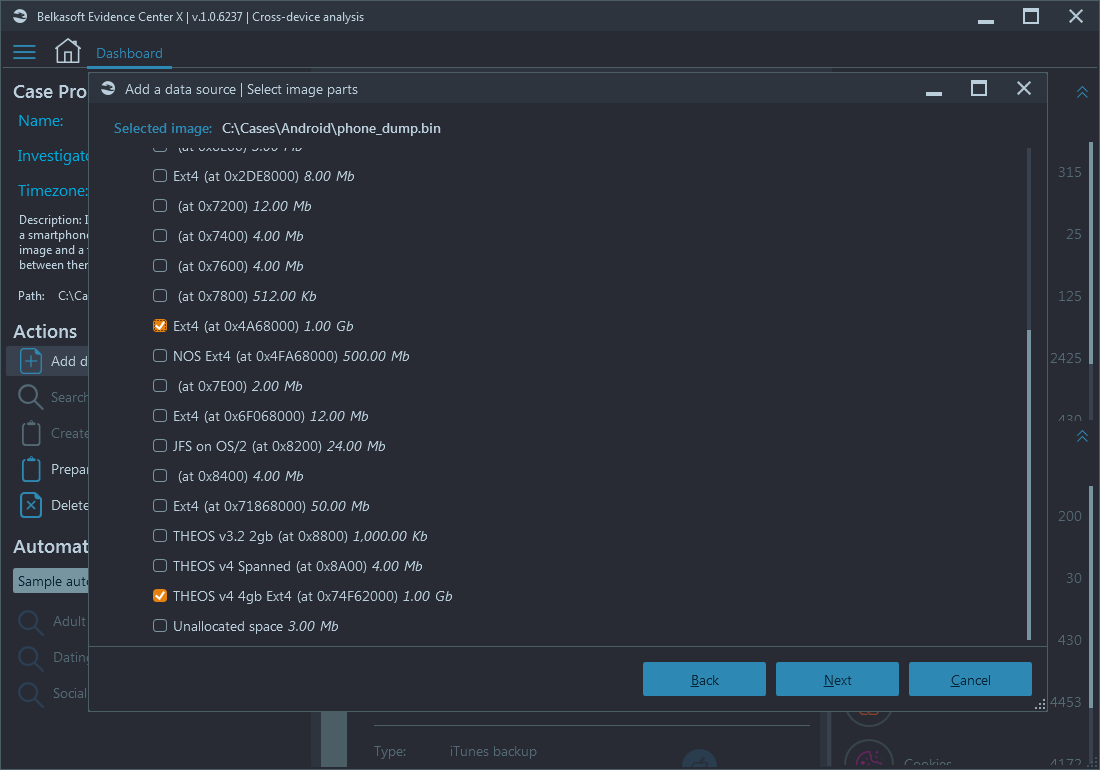
With Belkasoft X you have enough flexibility while adding data sources. In particular, you can specify parts of device to be added. As an example, on the screenshot below, an Android dump is being added, with multiple partitions:
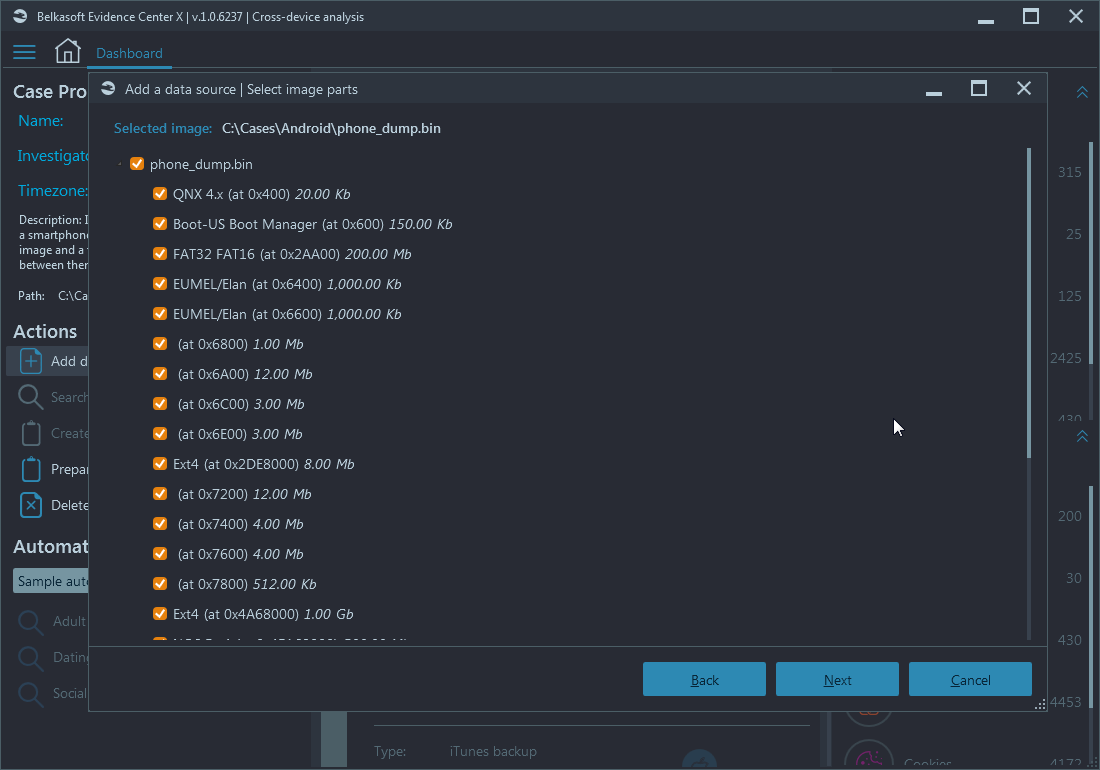
Adding all partitions not only adds extra waiting time for the analysis to complete, but may also introduce some unwanted artifacts, e.g. pictures found on system partitions. In many cases selecting userdata partition would suffice, and Belkasoft X allows you to do that:
There is even more flexibility when it comes to analysis of chosen parts of an image. Belkasoft allows to specify different types of analysis separately for each selected part:
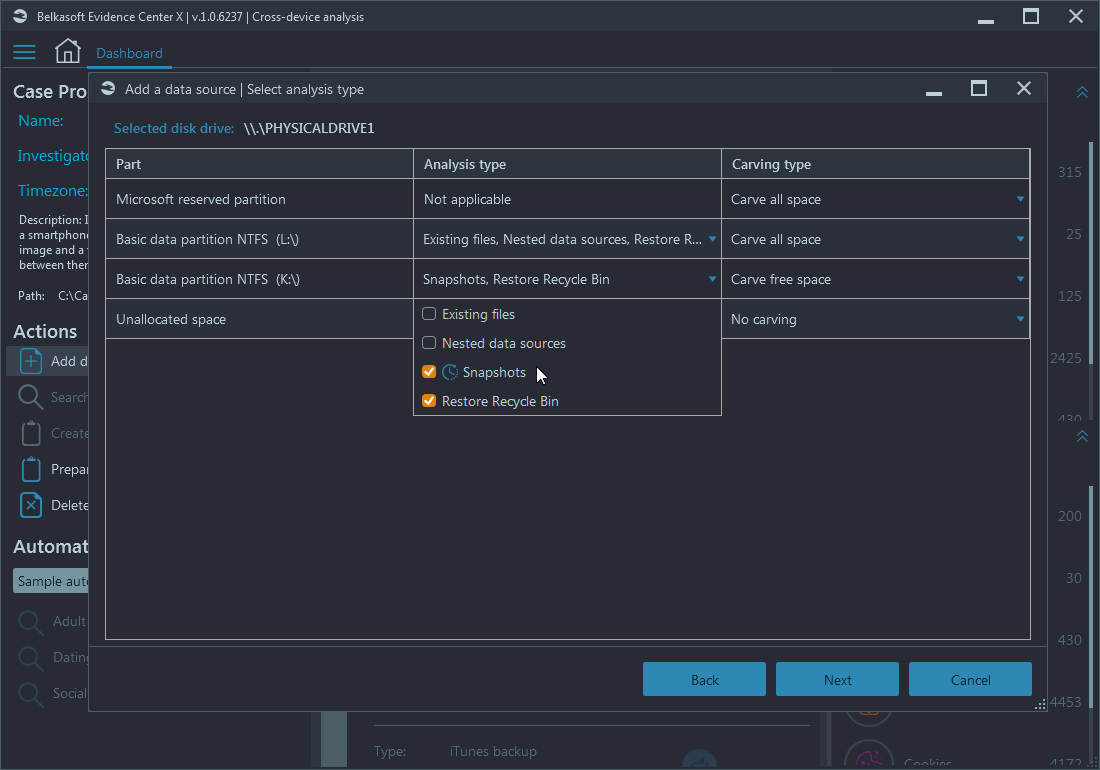
There are two basic types of analysis available on this screen: based on a file system (Analysis type) and based on the raw signatures search (Carving type). For Analysis type, you can specify to analyze existing files, automatically mount nested data sources (such as virtual machines, smartphone backups, hibernation files, etc.) and, when file system supports that, Snapshots and Recycle bin recovery. For carving, you can select no carving, full carving or, if file system supports that, free space carving.
Advanced device analysis
Once you are done with the analysis types, there are advanced analysis options available to you:

Profiles
Here, you start with specifying a profile. Profiles are the convenient means to switch between types of investigations and select proper Belkasoft X settings:
- Imagine, there is an Internet-related investigation. You are interested in emails, browser histories, chats and social networking and possibly do not need any other artifacts.
- You may work with child abuse materials: in this case, you are probably looking for pictures and videos (and maybe chats, too), calculating hash values and locating hash matches with hashsets like ProjectVic.
- Completely different type of investigation could be a corporate fraud case, when you are interested in analyzing documents and email. A fair portion of corporate documents would come from a scanner and, thus, they do not contain any text but rather JPG images with scanned texts. So, you are also interested in extracting such JPGs and recognizing texts from them using OCR (optical character recognition).
Profiles allow you to quickly switch between such different sets of options with just a couple of mouse clicks. Belkasoft X has a number of predefined profiles (grouping artifacts by operating systems as well as grouping settings by type of investigation), which you can use or adjust to your particular workflow:

Apps and artifacts
Once you set a profile, you can select artifacts. By artifacts, we mean any piece of information extracted from an application database, a file of particular format, a piece of data carved using specific signature and so on. Artifacts are grouped by type (audios, browsers, chats, documents, mails, social networks, system files, etc.) and then by operating system. To find one of many hundreds of artifacts, you can use the Filter text box and type a substring of an app:
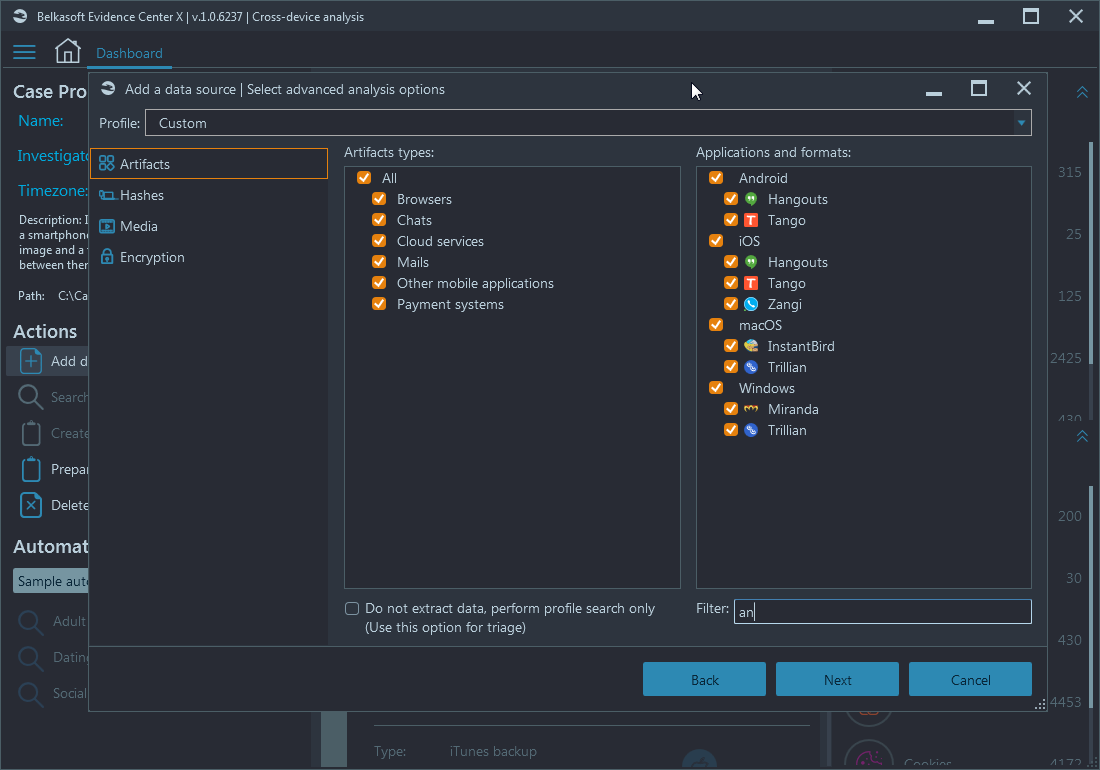
Only apps having 'an' in their names, are shown
There is one particularly important check box here, which allows you to create your own Triage profiles, but this is a topic for another big article.
Hashing
On the Hashes tab, you can specify which hash algorithms to use for hash value calculation. There are standard MD5 and SHA1, which are proven for collisions, and SHA256, which is more robust, but not that widespread. Many hash databases are still using first two, so your forensic tool must support them.
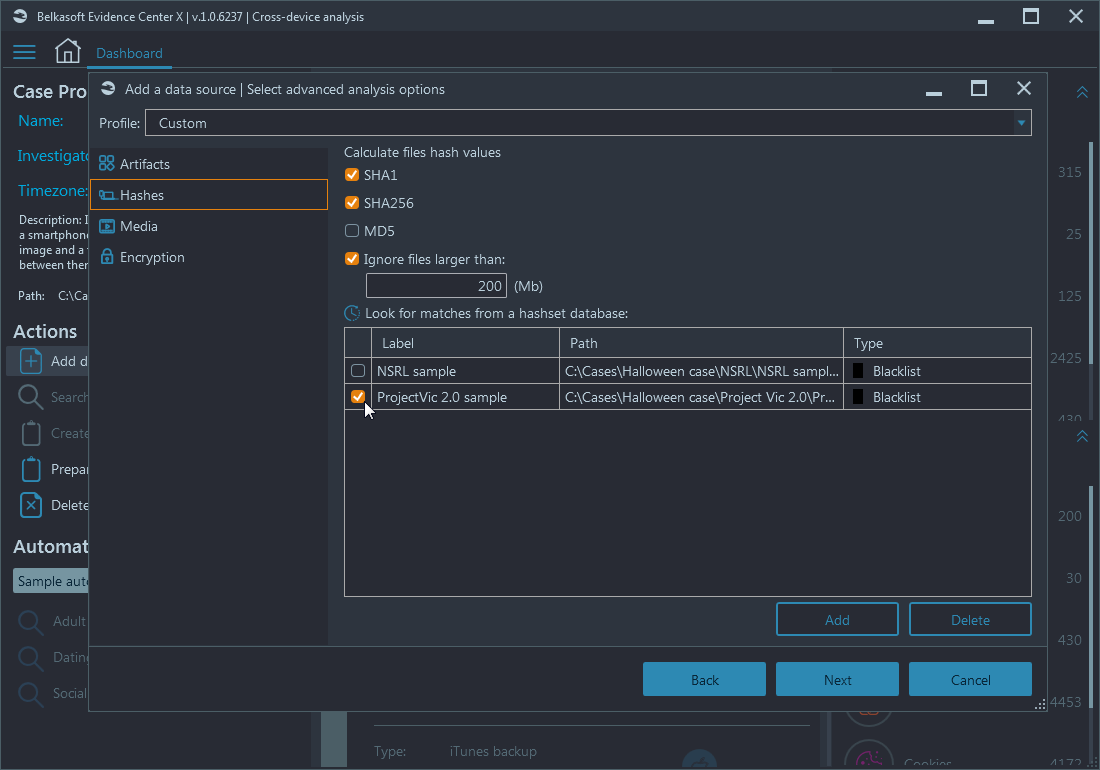
You can opt to ignore larger files to save time on hash calculations (for example, if you are only looking for pictures with CSAM, there is no need to calculate hashes for 1Gb files, since all pictures are typically in a range from few kilobytes to few megabytes, maximum few tens of megabytes).
At the bottom, there are hashsets, which you can add from various sources, such as NSRL databases, ProjectVic json files of versions 1.3 and 2.0 and, finally, your own handmade hashsets: any text file with one hash value at a line can be accepted by Belkasoft X as a hash database (no matter, which hash type was used, you can even make a file with a mixture of hashes of different types, Belkasoft X will correctly process them).
For the hashset added, you can specify whether it is blacklist or whitelist. Blacklist means something really bad, such as a CSAM or a malware,—the product will immediately report about such a match; while whitelist means something innocent, like a system dll file, which can be easily ignored—there is a filter to hide such files in the File system window.
Media file processing
On the Media tab, you can specify what types of pictures to look for. Belkasoft X supports search for faces, guns, pornography, skin and scanned texts. Note the Recognition language combo box, where you can select not just English but even hieroglyphic alphabets.
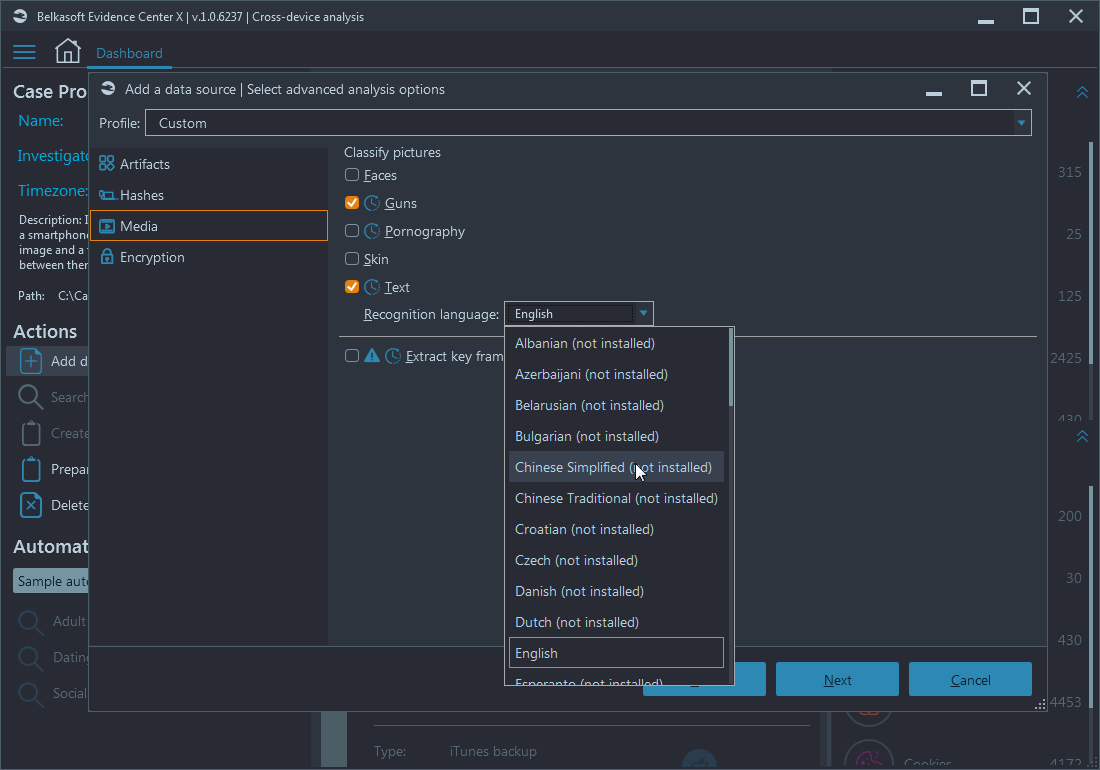
On the same window, you can extract keyframes from videos, but note the sign which warns you about potential long time it will take to complete this operation.
Encryption detection
The last setting on this window is encryption search. Its one check box only, however, it helps you to find about 300 types of file-based encryption (for instance, Microsoft Word, zip archives, QuickBooks, etc.) and WDE/FVE (for instance, Bitlocker, FileVault, VeraCrypt, etc.).
Completing adding a data source
Upon clicking Next, the product detects that your current options differ from the ones specified in the profile selected, and offers to either create a new profile, based on your settings or to update one of existing profiles:
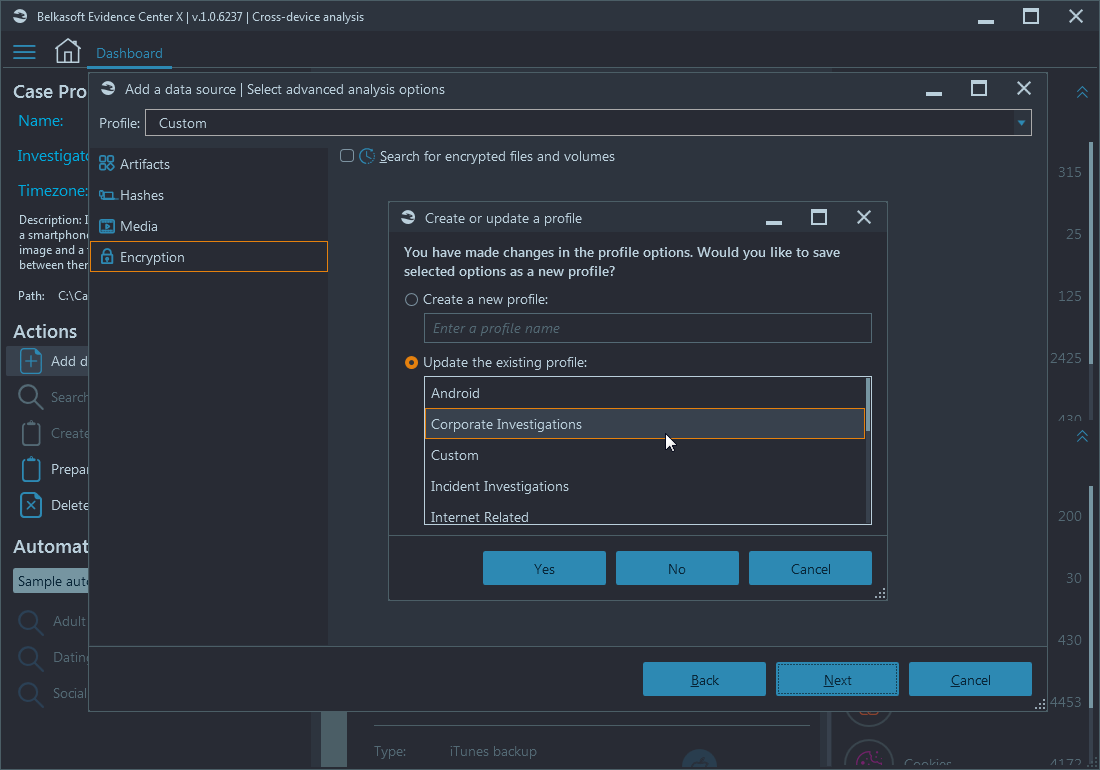
You may also click No to continue without updating profiles. The last screen just confirms your preferences, so that you still have the last chance to change them, if needed. Belkasoft X has this nice usability tweak, where all the 'begin something long' buttons have and eye-catching color, giving you a hint that there is no 'next window' in the sequence.
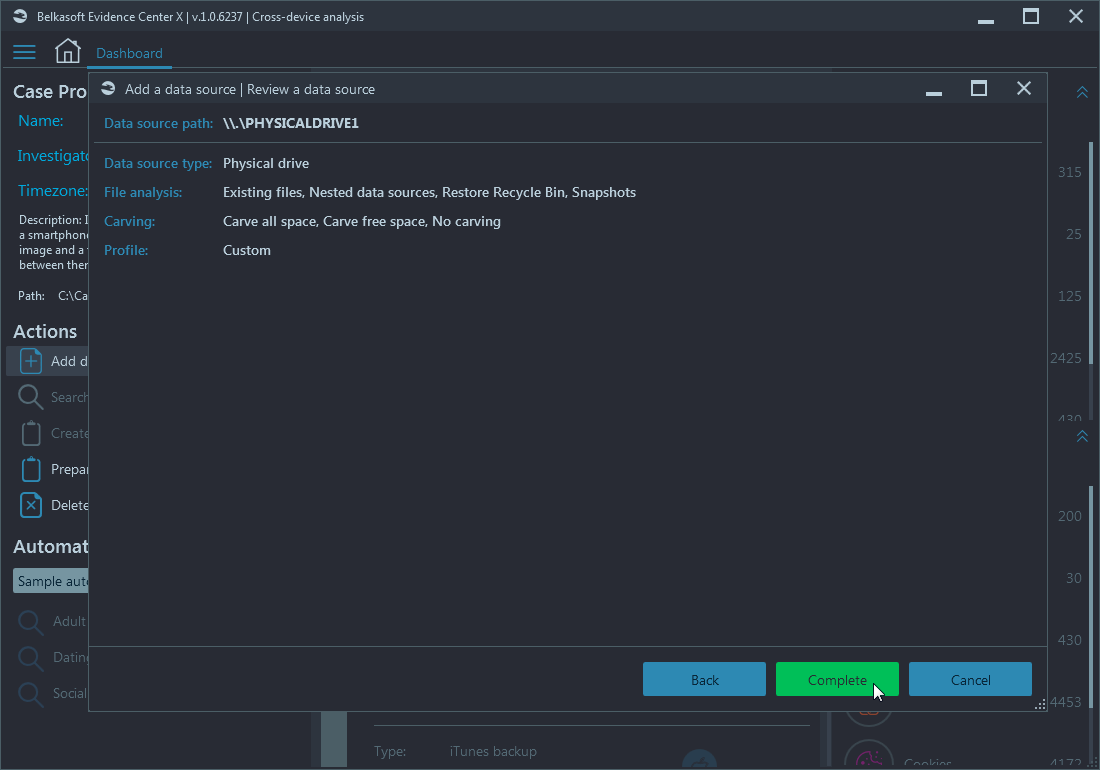
Once you click on the Complete button, the processing will begin. Do not worry, though—you can always cancel any running tasks in the Tasks window, should you change your mind.
Now, how can you see connections between different data sources? How can you analyze data from them together? There are a number of handy tools in Belkasoft X, among which you may use these two:
- Graphical and grid timelines
- Connection graph
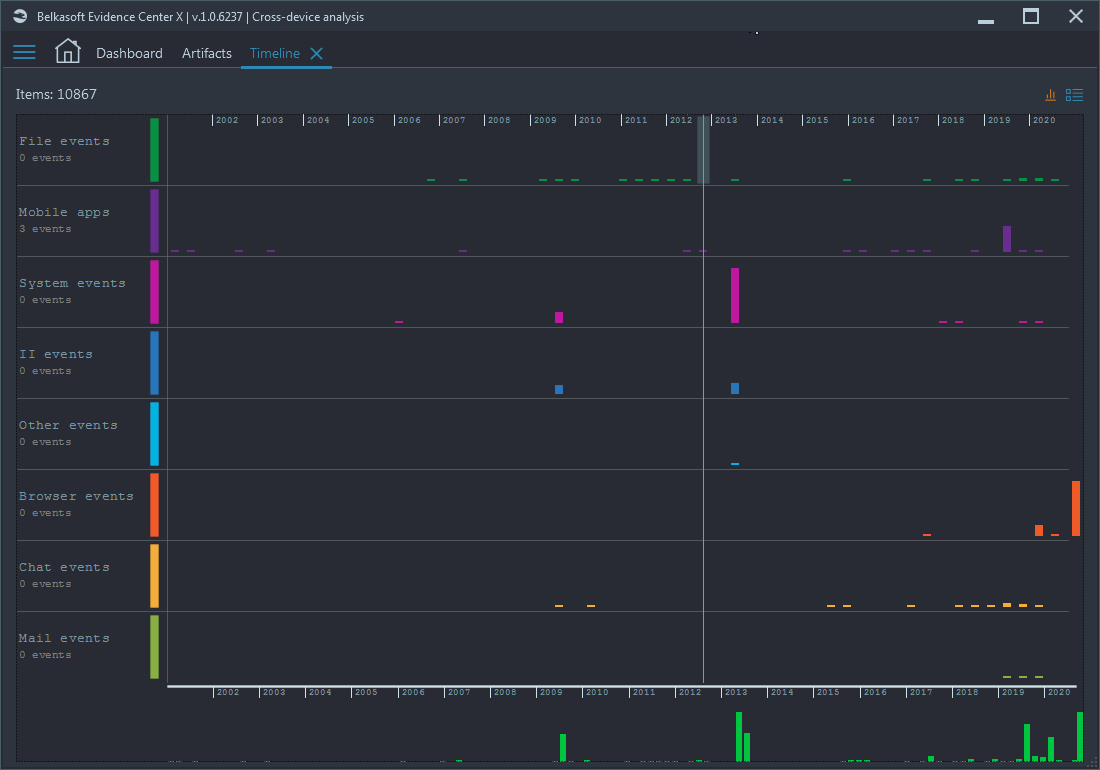
Graphical timeline
On the graphical timeline, you can see all the events found inside devices analyzed: emails and chats sent and received, URLs visited, pictures taken, devices rebooted, services installed, users logged in, and many more. All events are combined in categories so that it is easy to glance over the entire picture and determine spikes in types of events:
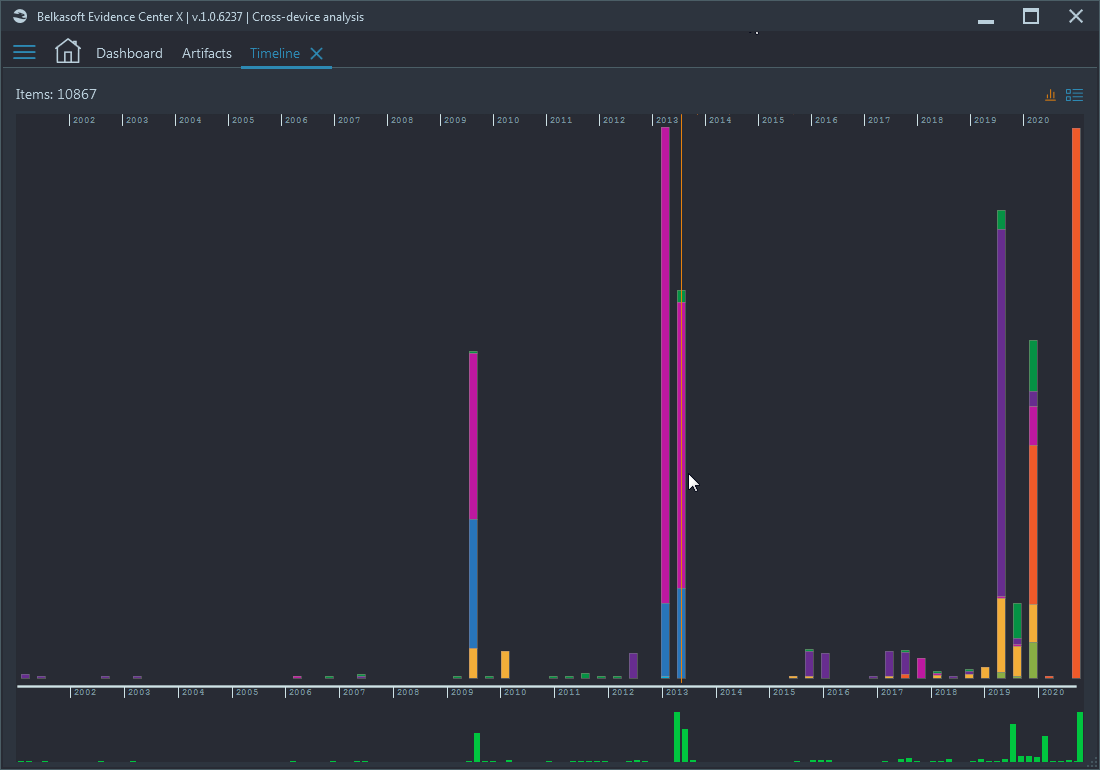
There are other views showing the same info in more detail or from a different angle:
Grid timeline
You can select a period of interest and switch to the grid view of the timeline, which will be synced with the selected period. In this view, you can further narrow your search by using other filters such as event type and text:

In a real case the timeline will contain hundreds of thousands of events, so you are definitely going to use multiple filters to locate needed data.
Connection graph
Connection graph of Belkasoft X shows you a top-level picture of all communications in your case, including communications found on different devices. Using this graph, you can locate any single connection between people, no matter which device captured the communication, a computer, a mobile, RAM memory or a cloud (which is not a device, of course, but which can be used to get data from, using Belkasoft X).

Every dot in the graph represent a person, while any connection between dots is their communication via email, chat app, social network, SMS, voice mail, Skype/WhatsApp or a regular mobile phone call. You may click on an edge to review all communication between two people. To exclude some less important dots from the graph, use Communication threshold slider at the middle top, which helps you to filter out people with less communications (spam or occasional calls or chats). This helps you to concentrate only on those having intensive exchange of information.
Conclusion
In this article, we have shown how Belkasoft X digital forensics and incident response software allows you to analyze devices and images of different types, using various configurable options and settings. Based on extracted and recovered information, you can review links and connections between various actors in the case as well as filter important events by using Connection Graph and Timeline views.